
How-to
How to Plan and Install a Sewing Machine Air Lift
How do I install a sewing machine air lift in a cabinet?
Measure the machine as installed, select a lift whose capacity and travel fit it, and build the cabinet opening and mounting support from the lift maker’s instructions. Center the machine over solidly mounted brackets, then test storage, free-arm, and flatbed positions before fitting the insert.
Installing a sewing machine air lift is a cabinet-fitting job, not a universal drop-in upgrade. Before cutting, verify the machine’s installed dimensions and weight, then compare them with the lift’s capacity, travel, mounting pattern, and the cabinet’s inside depth.
Choose the lift before you build the opening
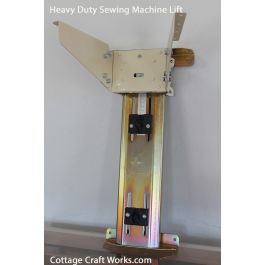
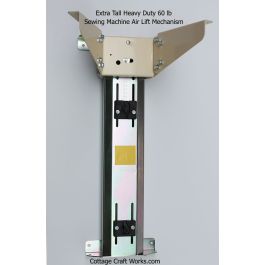
CCW’s standard German air lift is rated for machines up to 50 lb and up to 14-3/4 in. tall. The extra-tall heavy-duty version is rated up to 60 lb with 16-1/2 in. of travel for larger quilting and embroidery machines. Capacity is a maximum, not a guarantee of perfect counterbalance for every lighter machine.
Plan a supported, flush work surface
Use the lift maker’s mounting dimensions and opening guidance. The standard lift requires at least a 12-1/2 in. wide by 11-1/16 in. deep top clearance, while the final opening and acrylic insert must match the individual machine. Install into solid blocking or a solid mounting surface; do not create a long, unsupported shelf that places the machine far in front of the lift brackets.
After the lift is mounted, adjust it with the machine installed and test storage, free-arm, and flatbed positions slowly. Stop if the cabinet binds, the machine is not centered, or the lift does not hold position. Follow the supplied manufacturer instructions for the final hardware sequence.
Compare your options
Standard German air lift
A practical choice for compatible standard sewing and serger machines. It provides storage, tabletop/free-arm, and flatbed positions when installed to the manufacturer dimensions.
Extra-tall heavy-duty air lift
Use when a large quilting or embroidery machine exceeds the standard lift’s height or weight limit. Confirm cabinet depth and final lowered clearance before ordering.
What you need
- Sewing machine make, model, installed measurements, and weight
- Selected lift and its manufacturer installation instructions
- Cabinet or bench with solid mounting support and adequate interior depth
- Correct machine shelf and mounting hardware
- Tape measure, square, drill, and appropriate cutting tools
- Custom acrylic insert or template plan for flatbed sewing
Steps
Record installed machine measurements
Measure the machine’s weight, width, depth, and height with its spindle and cord in the position used when stored. Exclude detachable parts that do not lower with the machine.
Choose the lift and verify cabinet clearance
Match the machine to the lift rating and travel. Confirm the cabinet has enough interior height and depth for the machine, lift, shelf, and a safe closing path.
Lay out the opening and mounting locations
Use the manufacturer’s actual lift drawing and hole spacing. Mark the cabinet top, the back mounting surface, and any required solid blocking before drilling or cutting.
Build solid support and cut the opening
Provide at least the manufacturer-required solid blocking or mounting surface. Cut the opening square and leave room for the machine-specific insert; do not rely on a long unsupported shelf.
Mount and center the lift
Install the lift in the supplied hardware sequence. Fit the shelf so the machine’s weight stays centered over the Y-brackets rather than hanging forward of them.
Set positions and test without a project
With the machine installed, adjust the storage, free-arm, and flatbed heights as directed. Raise and lower it slowly several times, checking for binding, rubbing, loose fasteners, or an unstable work surface.
Useful links
- Open link
Shop Amish sewing cabinets and lift hardware
Cottage Craft Works sewing cabinet hardware
- Open link
Extra-Tall Heavy-Duty Sewing Machine Air Lift
Cottage Craft Works 60 lb extra-tall lift
- Open link
Manufacturer fit reference: lift opening sizes
Arrow Sewing guide to machine opening measurements