
Article
USA Clipper Reel Mower Assembly, Adjustment & Initial Setup Slug
How do I set up and adjust a new USA Clipper reel mower?
Assemble the handle according to the manufacturer's instructions, inspect the wheels and reel for proper operation, select the desired cutting height, and perform a paper-cut test across the entire reel before making any factory adjustments. If the mower cuts paper consistently and produces a clean test pass on short, dry turf, additional reel-to-bedknife adjustment is generally unnecessary.
USA Clipper reel mowers are designed as heavy-duty, serviceable mechanical mowers. Before the first mowing, properly install the handle, inspect the mower for shipping-related changes, confirm free wheel and reel movement, select the desired cutting height, and check the reel-to-bedknife relationship.
The most important rule is simple: do not begin adjusting the mower's hardware simply because the mower is new. First, determine whether it actually needs adjustment.
A properly adjusted reel mower cuts grass differently from a rotary mower.
Rather than striking the grass with a rapidly rotating blade, a reel mower passes the grass between the rotating reel blades and stationary cutting edge of the bedknife, producing a scissor-like cutting action.
For that reason, the relationship between the reel and bedknife is critical.
USA Clipper reel mowers are built and adjusted before shipment, but transportation and handling can occasionally affect the mower. A few minutes spent inspecting and testing a new mower before its first use can prevent unnecessary adjustments and help protect the cutting surfaces.
Step 1 — Inspect the Mower Before Assembly
The CL Clipper will be shipped in a heavy-duty box designed to protect it from shipping damage; damage is rare. You will want to carefully unpack the mower and keep the box in case you ever want to ship it to a mower shop for professional sharpening.
It will be much easier to unpack the head before assembling the handle. Set it on a bench to test and adjust. (see video)
Remove the mower and components from the shipping carton and inspect everything before beginning assembly. Pay particular attention to the orientation of the wheels to ensure they are straight up and down and do not appear to be leaning crooked toward the frame, or rubbing on the sides, which could indicate the mower was dropped on the end of the box.
Look for:
- Shipping damage
- Bent components
- Loose hardware
- Damaged wheels
- Missing fasteners
- Anything that appears to have shifted during transportation
Do not be concerned if there seems to be an oily film on the housing and parts. This is a good thing. Reel mowers contain no oil reservoir, so nothing is leaking. Maintaining a thin coat of lubricant on the reel blades and bedknife keeps rust from forming on the bare metal contact areas.
Step 2— Check Wheel and Reel Operation
Turn the wheels by hand, keeping hands and knuckles away from the blades, and observe the reel. They should engage the reel and spin it when the mower is simulated as being pushed forward, then release it when the wheel is turned backward.
The mower should operate smoothly without obvious binding. If the reel doesn’t turn, the bedknife is too close to the reel and will need to be adjusted. This can be caused during shipping.
You will notice mechanical resistance as demonstrated in the video. This is because the bedknife is ideally just touching the reel, which will cause a swishing sound or faint clicking when the reel spins. This is normal, and when the mower is pushed, the reel will not seem as difficult to spin.
Confirm that:
- Both wheels rotate normally
- The reel rotates smoothly
- The drive mechanism engages
- There is no unusual binding
- No components appear loose
If the mower operates normally, continue with the cutting test before attempting any reel-to-bedknife adjustment.
Step 3 — Understand the Reel and Bedknife
The reel and bedknife work together as the mower's cutting system.
Think of them as the two cutting surfaces of a pair of scissors.
The rotating reel blades carry the grass toward the stationary bedknife cutting edge. As the reel passes the bedknife, the grass is cleanly sheared.
For the mower to cut correctly, the reel and bedknife must maintain the proper relationship across the entire cutting width.
Too Much Clearance
If there is too much space between the reel and bedknife:
- Grass may bend instead of being cut
- Individual blades of grass may remain standing
- The mower may leave streaks
- The lawn may appear uneven
Too Much Contact
If the reel is adjusted too tightly against the bedknife:
- The reel may become difficult to turn or lock up
- Excessive friction can develop
- Cutting edges can wear prematurely
- The mower may become harder to push
- Unnecessary sharpening may be required sooner
The goal is proper cutting action—not maximum pressure between the reel and bedknife.
Step 4 — Perform the Paper-Cut Test
Before changing the factory adjustment, perform a simple paper test.
Use narrow strips of newspaper.
Position the paper between the reel blade and bedknife.
Carefully rotate the reel by hand as appropriate for the mower's design.
Check the cutting action at several locations:
- Left side
- Left-center
- Center
- Right-center
- Right side
The reel should produce a consistent cutting action across the mower.
What Are You Looking For?
A clean, consistent paper cut across the cutting width indicates that the reel and bedknife relationship is functioning properly.
If the mower cuts paper correctly across the width, do not readjust it simply because it is new.
The mower is ready for the next setup step.
Step 5 — When Should You Adjust the Reel?
Adjustment should be based on cutting performance, not guesswork.
Consider adjustment when:
- Paper cuts on one side but not the other
- One section of the reel does not cut paper
- Grass remains uncut in consistent strips
- The reel has excessive clearance from the bedknife
- Cutting performance has deteriorated through normal use
Before adjusting, make sure the problem is not being caused by:
- Grass that is too tall
- Wet grass
- Heavy dew
- Sticks or debris
- Grass buildup
- Improper mowing speed
- An unsuitable cutting height
A mower that is being asked to cut conditions outside the normal operating range may appear poorly adjusted even when the reel and bedknife are set correctly.
Step 6 — Make Reel-to-Bedknife Adjustments Gradually
When adjustment is actually necessary, follow the manufacturer's adjustment procedure.
Make small, controlled adjustments.
Do not make large adjustment changes in an attempt to solve the problem quickly.
After each adjustment:
- Rotate the reel and check for binding.
- Repeat the paper test.
- Check several locations across the cutting width.
- Continue only until consistent cutting performance is achieved.
Avoid tightening the reel unnecessarily against the bedknife.
The objective is a clean cutting action with minimal unnecessary friction.
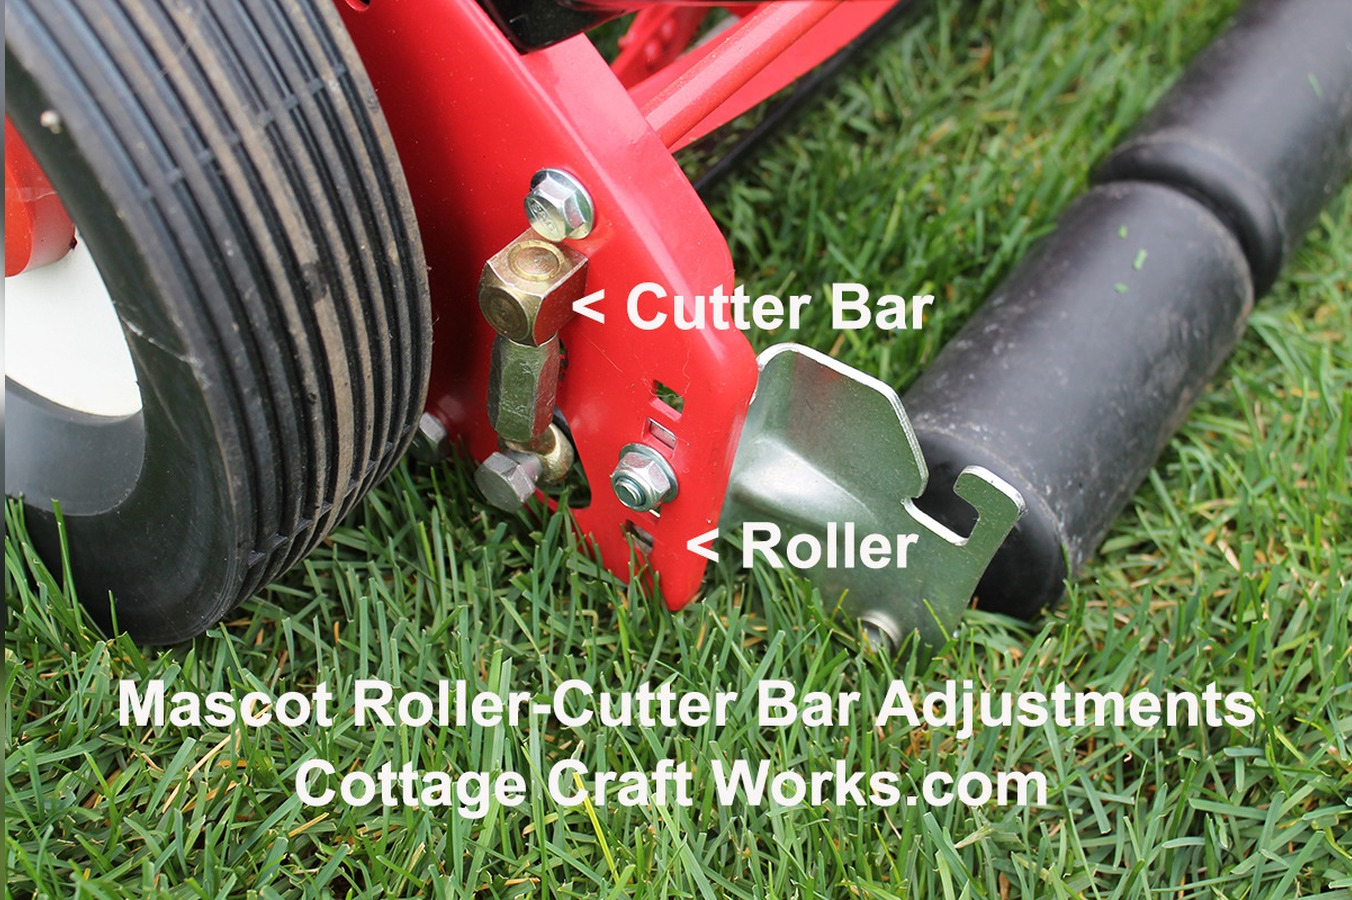
It is extremely important to maintain equal distances on each side of the mower bedknife. It is very easy to become distracted and forget the adjustment distance or turn clockwise on one side when you meant to turn counterclockwise. This will align the bedknife at an angle, and although it may pass a paper test, leaving it in this position will ultimately cause the reel cage to cone to match it.
The clipper uses the adjustable trunnions and takes a 9/16” open-end wrench. To bring the blade closer, you would turn the trunnion clockwise. To move it further away, you would adjust counterclockwise. Keep in mind that if you are making these adjustments with the mower head lying upside down, as shown in the video, those adjustments would be made in the opposite direction.
Use a tape measure or caliper to measure the distance along the adjustment trunnions on each side of the mower to ensure they are equally adjusted at the same distance.
Small changes can make a significant difference.
Avoid aggressively tightening the bed knife simply because the mower isn't cutting.
If the mower locks up, it is adjusted too tight; loosen the bed knife evenly on both sides until the reel turns freely. Then proceed to adjust until the reel is just touching the bed knife. Proper adjustments will produce a faint clicking or swishing sound as the mower cuts.
If the cutting surfaces are dull, excessive tightening isn't a substitute for sharpening.
Toro similarly notes that excessive reel-to-bed-knife contact can increase wear and power requirements.
Step 7 — Set the Cutting Height
Select a cutting height appropriate for the grass being maintained.
Reel mowers are designed primarily for regular finish mowing of relatively short turf.
They are not intended to function as brush cutters or field mowers.
For most applications, reel mowing works best when the lawn is maintained consistently rather than being allowed to grow above 3 inches tall between mowings.
A practical operating range is generally ½ to 3 inches, depending on grass variety, mower setup, lawn condition, and mowing frequency.
Avoid attempting to remove excessive grass height in a single pass.
Trying to remove too much grass in a single pass makes mowing more difficult.
The axle wheel nut will need to be loosened each time to make height adjustments and then tightened back down. This is important because the gearing is manufactured in the back of the wheel, which then turns the pinion gear on the reel shaft. If the wheel is left loose, it will ride at an angle on the pinion gear, causing premature wear on both.
Step 8 — Install the Handle
Install the handle according to the instructions supplied with the mower. The reel comes fully assembled, leaving the handle needing to be assembled. It is a rather simple, straightforward process; however, some people can really struggle with it, especially with aligning the bolt holes and the nameplate. At the end of the video, you will see how it should come together easily and how using an awl or a Phillips-head screwdriver can simplify the alignment.
Make sure:
- Both lower handle sections are correctly positioned
- Handle mounting points are fully seated
- Bolts and fasteners are properly installed
- Hardware is securely tightened
- The handle is straight and stable
Do not operate the mower with loose handle hardware.
After assembly, push the mower forward a short distance and confirm that the handle remains secure.
Step 9 — Make a Short Test Pass
After completing the initial inspection and setup, mow a short section of lawn before beginning the entire property.
Look behind the mower.
The grass should appear:
- Evenly cut
- Cleanly clipped
- Consistent across the mower width
- Free of obvious uncut strips
If the mower cuts correctly, continue mowing.
If it does not, investigate the cause before immediately changing the reel adjustment.
Don't Confuse Tall Grass With a Mower Adjustment Problem
One of the most common mistakes with reel mowers is assuming that poor cutting automatically means the mower needs adjustment or sharpening.
Reel mowers are maintenance mowers.
They work best when the grass is already within the mower's intended cutting range and is mowed frequently enough to remain there.
A reel mower may struggle when attempting to mow:
- Overgrown grass
- Heavy weeds
- Thick stems
- Wet grass
- Grass covered with heavy morning dew
- Turf containing sticks and twigs
- Leaves and leaf stems
- Rocks or other debris
Correcting the reel adjustment will not turn a finish-cutting reel mower into a field mower.
Keep Sticks and Debris Away from the Reel
Before mowing, inspect the lawn for sticks, stones, heavy leaf stems, and other debris.
A hard object caught between the reel and bedknife can:
- Nick the cutting surfaces
- Affect adjustment
- Create a high spot
- Cause binding
- Damage a reel blade
- Damage the bedknife cutting edge
Cleaning the lawn before mowing is an important part of reel mower maintenance.
Avoid Mowing Wet Grass
Whenever practical, mow when the turf and mower are dry.
Wet grass can:
- Build up around the reel
- Interfere with cutting performance
- Make the mower more difficult to clean
- Promote corrosion of metal cutting surfaces
Early-morning dew can create many of the same problems as mowing immediately after rain.
After mowing, remove accumulated grass and store the mower in a dry, protected location.
Use a leaf blower to blow out the grass clippings and try to avoid washing with a garden hose. If you do have to wash, avoid getting water into the gear housings, and quickly dry the reel and bedknife with a leaf blower or blow-dryer. Immediately coat the reel blades and bedknife with a thin coat of spray lubricant to prevent rusting.
Initial Break-In and Inspection
At the end of each season, the wheels should be removed as shown in the video to clean out grass clippings and caked-on grease from the gear housing.
During the mowing session, periodically inspect the mower.
Check:
- Handle hardware
- Loose bolts and nuts
- Wheel operation
- Reel movement
- Cutting performance
- Reel-to-bedknife relationship
- Height adjustment hardware
- Lubrication points
New mechanical components can settle slightly during their first period of operation.
If cutting remains clean and consistent, and it continues to pass the paper test, there is no reason to continually alter the adjustment. Over time, metal wear between the reel and bedknife will require adjustments to the mower.
USA Clipper's Replaceable Bedknife Cutting Surface
An important difference between the USA Clipper and many traditional reel mowers lies in their bedknife construction.
The USA Clipper uses a replaceable, heat-treated cutting knife mounted to the bedknife bar.
This provides a durable cutting surface, and the hardened cutting surface is intended to extend service between sharpening under comparable mowing conditions.
This does not eliminate the need for proper adjustment.
Even a premium cutting system performs best when the reel-bedknife relationship is maintained correctly.
Adjustment Before Sharpening
When cutting performance declines, sharpening should not automatically be the first step.
Start by checking:
- Grass condition
- Grass height
- Lawn debris
- Reel cleanliness
- Reel-to-bedknife adjustment
- Paper-cut performance
If the cutting edges remain in good condition but the reel has moved slightly out of adjustment, correcting the adjustment may restore performance.
Sharpening becomes appropriate when adjustment alone can no longer produce a clean, consistent cutting action.
Cottage Craft Works offers the Mascot Reel Mower Sharpening Kit, a backlapping kit that applies a grinding compound to the reel and spins the blade backward. It is a tune-up sharpening and is not intended to repair severely dull or damaged blades. (The Resource Page: How to Sharpen & Hone a Reel Mower) For more information.
At some point, the mower will need to be professionally sharpened using precision machinery designed to sharpen the reel and bedknife.
How to Know When the Mower Is Ready
A properly set-up Clipper reel mower should:
- Roll smoothly
- Drive the reel consistently
- Have secure handle hardware
- Maintain the selected cutting height
- Cut paper consistently across the reel
- Cut grass evenly during the test pass
- Operate without excessive reel-to-bedknife friction
Once these conditions are met, stop adjusting and mow.
Continually tightening or changing a mower that is already cutting correctly can create problems rather than solve them.
Disclaimer
This information is provided for general educational and product-support purposes. Mower designs, adjustment procedures, hardware, and specifications may vary by model or production period. Always follow the manufacturer's current assembly, adjustment, maintenance, and safety instructions. Keep hands and fingers away from the reel and bedknife cutting surfaces, and use appropriate precautions whenever inspecting, adjusting, cleaning, or servicing a reel mower.
Watch
-
USA Clipper Reel Mower Assembly, Adjustment & Initial Setup
Photos
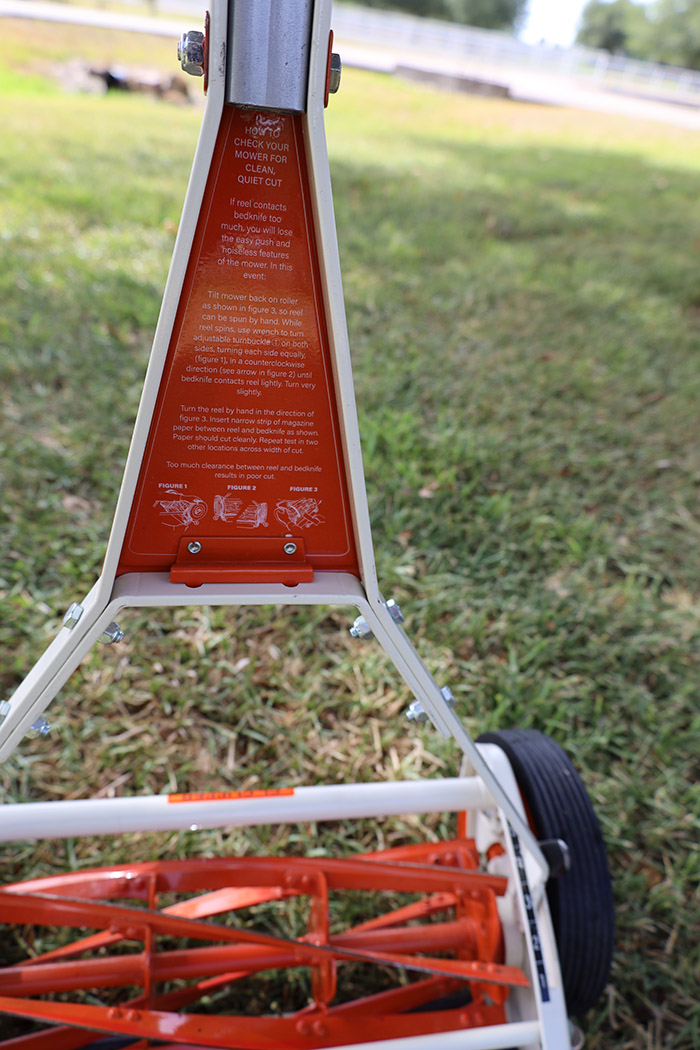
Clipper Mower Name Plate and Handle Installed
Downloads
- Download
Clipper Mower Owners Manual